Kate and I made apple chips. Yum.
Busy day so I’m keeping it simple.

Crafting and kids.
I’m back! The girls were very intent on their morning sticker project (thank you Target!) so I worked on December Daily at the kitchen island. Nice to have some group craft time. 🙂 First up, day 10.
On Saturday, I didn’t take very many pictures at all. Here’s one of Kate playing in the backyard while Michael worked on cleaning up. Santa told us to clean up the backyard before Christmas; I wonder what he has planned? 🙂 Michael and I went out on a fabulous date, but I deliberately chose not to bring the camera. Sometimes you just need to be present in the moment, know what I mean? It was glorious.
Since day 10 uses a transparency as a base, I thought I would show you what it looked like with day 11 in place as well. Have I mentioned that I love transparencies? Just a few times? lol.
Here’s the back of day 10. Just a piece of patterned paper to cover the back of the photo and a small journaling block. The journaling block has Christmas trees on the back that you can see through on the other side. <3
And then onto day 11! We went to see the Zilker Tree. I miss the Trail of Lights, but Kate was amazed at the tree. Her whole face lit up as we walked towards it.
I had a lot of fun playing with the bokeh. I considered correcting the color in these shots, but I kind of like that Kate has the color from the lights reflected in her face. Something different. That and when I tried to correct the white balance, it looked all wonky. Let’s just go with it being a deliberate choice, m’kay? Thanks. 🙂
Love these. 🙂
We also decorated gingerbread houses with Kate’s cousins, so I added another page to get in some more pictures. These are just simple collages taped back to back. I added a fabric tag for a little somethin’ somethin’.
And there you have it!
I took last night off from December Daily. I just wasn’t feeling inspired, know what I mean? I’m sure I’ll get caught up today or tomorrow. 🙂
We had a fun crafty playdate this morning, but sadly I took almost no pictures. Eh.
Another simple page as I had to work tonight. Added a bit of washi tape and some letter stickers and called it good. 🙂
We went shopping that evening and almost finished our Christmas shopping. Exciting! We also bought Kate the Little People nativity set and it was a huge hit. So glad we got it. After Kate went to bed, Michael and I started in on the wrapping while we watched Dexter.
This is another super simple page. I actually tried to use a little journaling sticker that I have from a million years ago, but the ink got all smudgy so I just wrote directly on the background paper.
I just realized that I forgot to ink the edges of these pages. Fear not, I shall do it tomorrow. On that note, I am somewhat shocked, but very happy, that I have managed to keep up this far! I’m 1/3 of the way through y’all!
We had a lot of fun on the 7th! First, Kate made this page for December Daily while I worked on day 6. I love having her do this project with me. 🙂
I just realized that this picture is sideways. Tilt your head a bit, okay? Thanks.
Here are some pictures of Kate doing stickers. I went ahead and put the number 7 on the back since I didn’t want to add anything to her page.
Then we made wrapping paper! It was so much fun. I just taped down some butcher paper and let Kate go to town with the paint. It made a huge mess, but at the end Kate turned to me with a huge smile and said, “Mama, I’m happy.”. ::melt::
I put the photos back to back with these pictures from us picking out our Christmas tree. There was some crap along the left side of the pictures, so I added some washi tape and some letter stickers. I think it turned out pretty cool.
This picture was my favorite.
And here’s the backside. I actually made this page on Sunday in preparation for whenever we got a tree. I cut strips of ribbon to make the tree and then stitched along the edges. I stitched another piece of paper to the back to hide the stitching. It was a lot of fun!
This is a huge long post and should probably have been done with the real camera/ my computer, but I’m tired so iPhone it is. 🙂 Michael and I pretty much finished our Christmas shopping tonight and we had a wrap-a-thon/ Dexter viewing tonight. Go us! 🙂
Kate decided that the baby du jour would be her octopus. She even buckled in his little tentacles. I thought that I might die from the cuteness. 🙂
I used some more washi tape. I lurve it. Seriously, it’s the bomb.
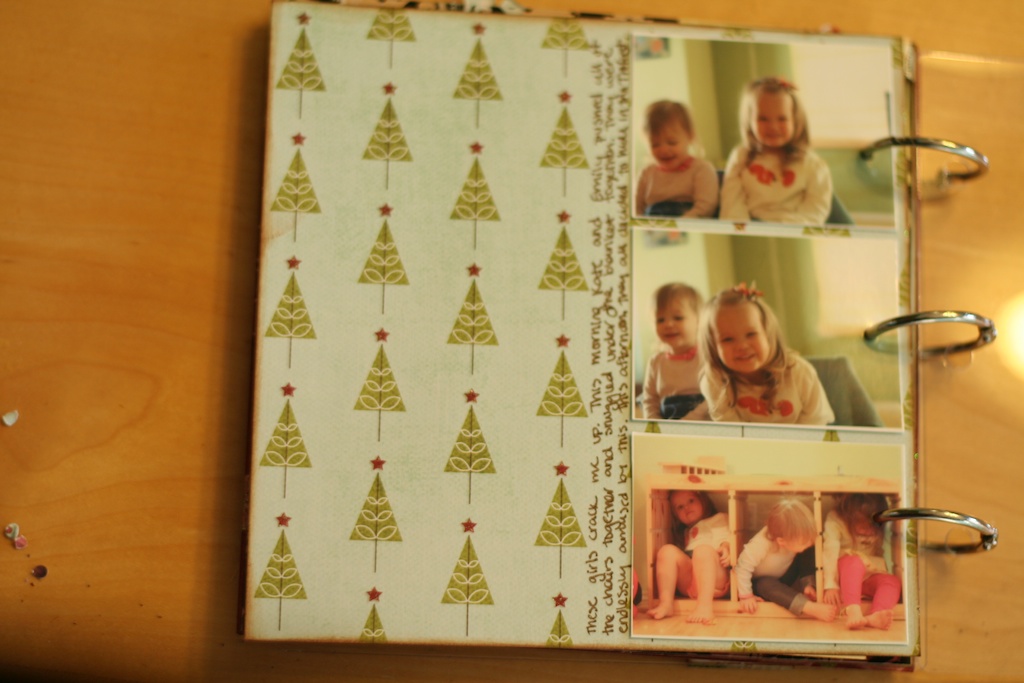
And here’s the back. The girls took out the tubs and crawled inside the cabinet. They thought it was *hilarious* and to be fair so did I. 
The littles decided not to nap this afternoon so today’s page is a little plain (and an iPhone photo). Don’t judge me. 🙂
I made 2 collages and adhered them to another transparency. I typed the journaling directly onto the photo before I printed it as an experiment. I have to say that I’m not thrilled with how it turned out, but I deliberately take risks with December Daily so I’m not too bothered by it. I added a rubbon number 5 and called it a day.
All of the girls took great naps today ::bliss:: so I had time to work on day 4 this afternoon.
I scaled down 4 pictures to fit on one 4×6 photo and put 3 of them on the front of the page. We went over to see my grandparents on Sunday and Kate got a new ornament. Mimi was totally awesome about helping me stage a photo opp of Kate hanging the ornament on their tree. Thanks Mimi!
I matted the pictures on a strip of patterned paper and added a bit of ribbon. I found these chipboard glittery stars and I added a Thicker “4” and a title and called it a day. 🙂
The back is simple, just the remaining photo and a bit of journaling. Love keeping the backs simple.
I love that I’ve roped so many people into doing this with me! I can’t wait to see everyone’s books in person. 🙂
Well hello there day 3. Michael took Kate over to his parents’ house this morning so I got in some good quality December Daily time. Oh, and there was some Gossip Girl watching at the same time. Trashy TV *and* scrapbooking? Yes please!
We went with some friends to the Children’s Museum on Saturday to decorate gingerbread houses so I had a million a few really cute pictures to work with. I couldn’t narrow it down to 3 or 4 pictures so I added extra pages. They weren’t all 6×6 so I went ahead and put the binder rings on before I took the pictures.
Here you can see the back side of Day 2 and the front side of day 1. Now, it’s on a transparency so you can see the next page peaking through. I <3 playing with transparent pages.
I adhered the photos back to back sandwiching the transparency so the adhesive wouldn’t show. You can sort of see the back of the rick rack and Christmas tree, but that doesn’t bother me in the slightest.
I had more photos to include, so I added some extra pages. I typically make them *not* 6×6 so that it’s obvious, at least to me, that they are not the start of a new day.
This is just a 4×6 photo with a thin cardstock mat.
On the back, I did the journaling for the day. You can’t really tell from the photo, but that’s an acrylic snowflake. I ran it through my xyron and set it on a piece of patterned paper. Then I cut around it with an exacto knife and filed the edges with a nail file. So the patterned paper is on the bottom and the acrylic is on top. Hard to explain, but it looks pretty neat. 🙂
Still had a few more pictures (honestly, is there much that’s cuter than a 2 year old decorating a gingerbread house?) so I made 2 more pages that were a just big enough to give a little frame to a 2×3 photo.
These mini pages each have a picture on the front and the back so I was able to add 4 more photos. I love that I have the freedom to add more pages when I need to! I’m pretty please that I’ve been able to keep up so far, but the month is young. We’ll see how I do next week. 🙂