Summer Page

I’m way a little bit behind on Kate’s scrapbook, but I’m making progress.  This page is from August.

I really liked the look of using the patterned paper as a mat, but it was a bit too busy so I added a solid colored mat too.  I didn’t want to sacrifice a whole sheet of green card stock though (I’m cheap, what can I say?) so I cut it out from where it would be covered up.

Then I inked the edges of everything and layered it all up.

I outlined the edges of these stickers with a brown pen to give them a bit of definition.

A little bit of flower trim and ric rac and I called it good!

Pretty simple, but I’m happy with the way it turned out.

Felt Heart Banner Tutorial

Kate and I are hosting a special Valentine’s Day party for our playgroup.  I have a bit of a tendency to go overboard with the planning of these things, but I sometimes lack follow through.  🙂  This time I actually managed to finish one of my planned projects!  It’s a felt heart banner based on this tutorial from, where else, Pinterest.

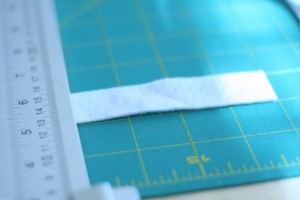
Of course I had to change it up a bit.  🙂  I started off by cutting some felt into strips 1 inch wide and 4 inches long.


Such pretty little felt. 🙂


I didn’t end up having enough red, so I decided to make red squares in between the hearts instead of red hearts.

I sewed pairs of red squares together to give them a bit more definition.  Then I started on the hearts.  First stitch 2 strips together.  Then open them up and stitch the bottoms.  Voila!  Hearts.

The tutorial has you sew all of the hearts before cutting them down to 1 inch wide.  In retrospect, that might have been easier.  🙂

I spent forever stitching the hearts together in a chain.  I tied the thread off at one edge of the first heart, ran it through the red square and then tied it off at the edge of the second heart.  I was pretty proud of myself for doing it this way because it kept there from being a thread through the center of the heart.  Of course I was only proud of myself until I tried to hang it.

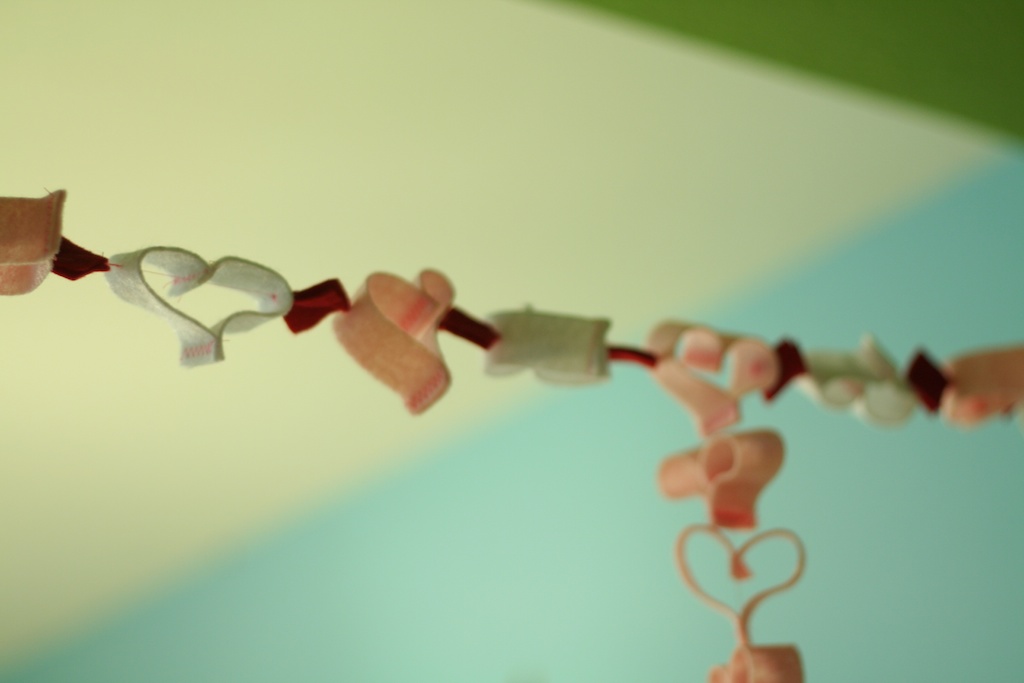
Then I noticed that the weight of the hearts was causing them to flatten and look idiotic.  ::sigh::  I took it back down and strung the hearts like beads.  Much quicker and with the added advantage of not pulling the hearts flat.

You can hardly tell that the thread is there anyway.  I should have done it this way from the beginning!  The hearts are kind of wonky and turned in different directions, but I like it that way.  It seems more playful and less Martha Stewart.  Perfect for a playgroup.

I had some extra hearts so I added them hanging down from the banner.  All in all, I think it turned out super cute!

Taggie Blanket Tutorial

When I was pregnant with Kate (a million years ago!) I saw some homemade knock off taggie blankets in a cloth diaper store and I thought, I can make that.  🙂  It took a bit to figure out, (especially because it was pretty much the first thing I had ever sewn other than a scrapbook page) but I ended up pretty pleased with the result.  Kate sleeps with it every night.  In fact, it’s the blanket for her special bear, Boris (long story.)

It should become quite apparent at this point that I was *not* a sewer when I picked these materials.  Both of these are a bit difficult to sew (understatement!) but the different textures are fun for babies.  What compelled me to put these on the blog after all this time?  Well, my awesome sister-in-law is pregnant with twin boys (so excited for her!) and I wanted to add something homemade to her baby shower gift so I decided to make 2 of these.


Initially, I wanted to make them coordinating and not identical (which is how their mom plans to dress them) but them I found this brown satin and blue minky.

After I found this awesome ribbon (that matched perfectly!), and I knew I had to use it.  Since I didn’t have it in green and I bought it forever ago, I decided that identical blankets would be the way to go.

I cut the ribbon in maybe 3 inch strips, folded it in half and pinned them to the satin loops facing in.  Don’t pin it to the minky!  It’s way too stretchy, trust me.

I went with 3 ribbon loops across instead of 4 this time.  When you use 4, they have a tendency to get caught up in the corner seams.  3 is *much* better.  Trust me.


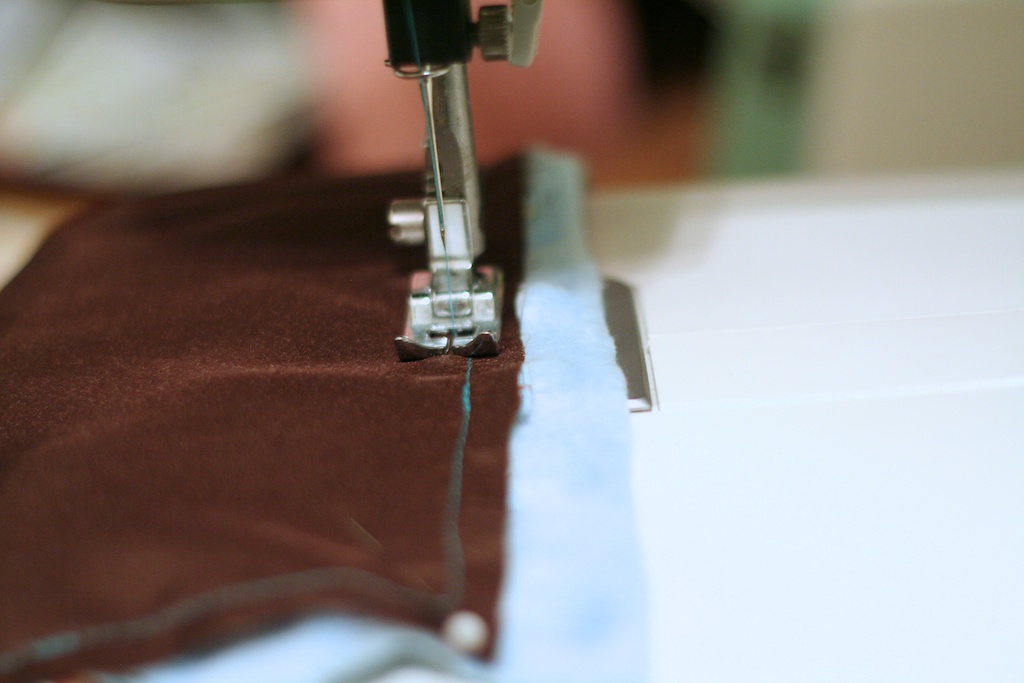
Stich once around the satin to catch all of the ribbon loops.  I like to backstitch over them to make sure that the ribbon won’t be pulled out as the baby plays with it.

Once you’ve gone all the way around the satin, pin it to the minky right sides together and stitch around again.  The minky will stretch out and get all out of shape, but that’s ok.  Just use your satin as the guide and your final blanket will be square.

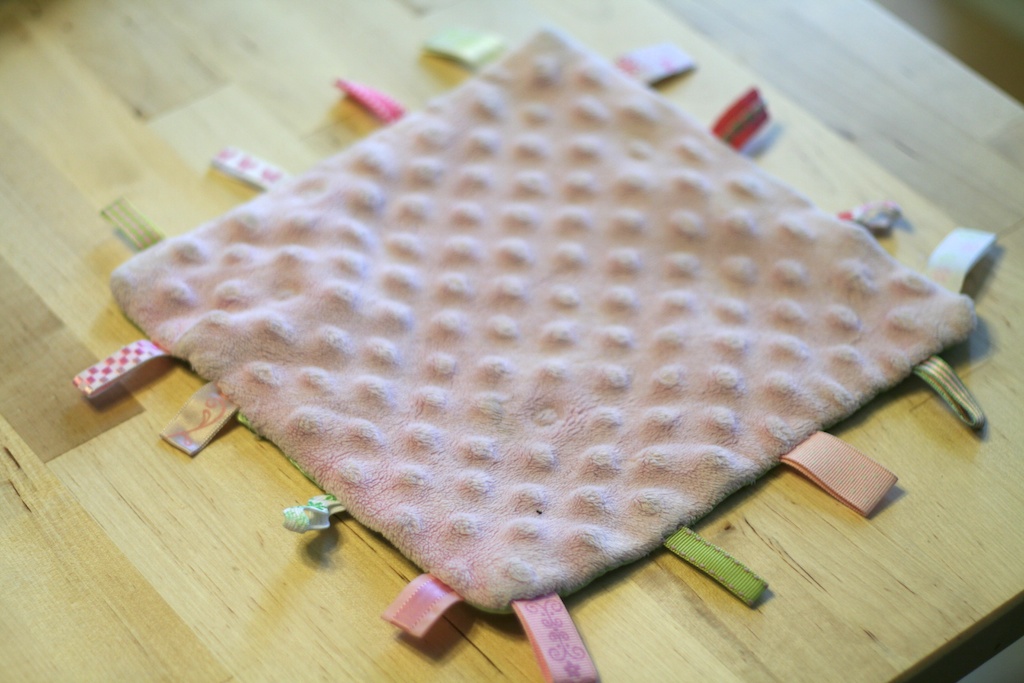
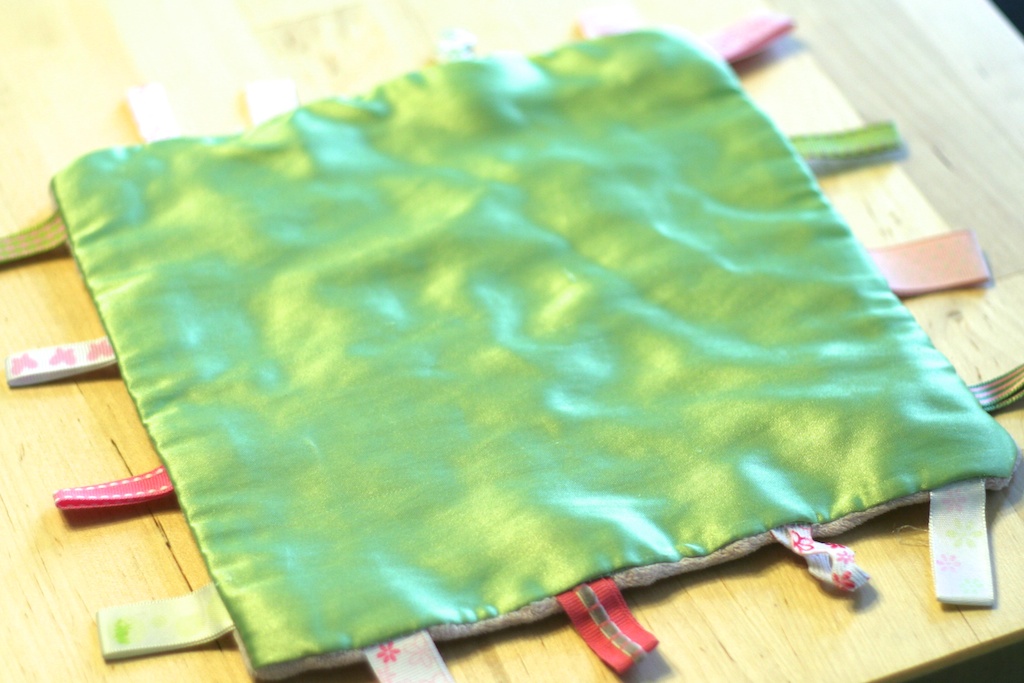
Leave a little spot to turn the blanket right side out and then hand stitch it closed.  I’m pretty lazy with the hand stitching, so I only leave about an inch, maybe an inch and a half.  I don’t have a picture of the blue ones, because I finished them right before the shower and forgot!  Trust me though, they turned out really cute.  🙂  I’ll leave you with a picture of Kate’s instead.

After 2 1/2 years, it’s a little worse for wear, but I think it’s held up surprisingly well.  Her’s is pink minky on one side and this green satiny stuff on the other side.

Brings back memories!


Goals Update!

Let’s see how I did, shall we?

1.  Lose 4 pounds.  Hot damn y’all, I did it.  I started the month off at -17 and ended it at -22!  Now I just need to keep the momentum going.  Let’s say another 4 pounds for February.

2.  Work out twice a week.  Um, yeah no.  I think I worked out twice in the month of January.  Might have to carry that goal over.

3.  Update the blog 3 times a week.  Success!  I need to get my buffer built back up, but I have a lot of cool things in the works.  Stay tuned!

4.  Finish December Daily.  I did it!  So glad it’s done and I’m loving how it turned out.

5.  Make 4 new mama crafts.  Hmm…  I made a skirt, an apron, some taggie blankets for a gift (more on that next week) and several scrapbook pages.  OK, so I made the skirt on December 31st, but that still counts, right?  RIGHT?  Umm…  I have a lot of other projects that are half done.  Need to get them finished.  🙂

6.  Cook 2 dinners.  Done!  One was even edible!  I think I might have to break up with my crock pot though.

7.  Do 4 new Kate projects.  Let’s see.  The cloud dough and water beads were our only big projects, but we also did lots of stickers, playdoh, cookie decorating and a pretty cool field trip.  I need to get more intentional about this though.

8.  Plan 4 date nights.  I managed to do 3 which would be pretty good if Michael hadn’t totally shown me up.  🙂  He orchestrated a Kate/ grandma sleepover, ordered me a gorgeous new dress and picked a great new spot for dinner.  My husband’s the best.  Might need to step it up next month.  😉

9.  Order and Edit December Pictures.  Done and done.  Now, there was a bit of an issue with the pictures for Project Life (they’ll have to be reprinted ::sad face::) but Shutterfly was totally awesome and issued me a print credit even though it was probably my fault.  I just need to sit down and resize them all/ reorder them.

10.  Walk Ninja daily.  Poor ninja.  She always gets the short end of the stick.  She has been getting more walks, but still not daily ones.  Before Kate was born, she used to get TWO walks a day, I should be able to make one happen.

11.  Clean up my bedroom.  We did it!  Of course, it’s starting to look a bit pit-like again what with the piles of laundry that need to be folded, but underneath it’s clean.  Like we threw away/ donated to Goodwill trash bags full of stuff.  It was super cathartic.

12.  Write thank you notes.  Done and done!

The Luminaria

This super awesome sculpture thing called a luminaria was in Austin for 1 week.  Umm…  Methinks it’s field trip time!  The line was supposed to be several hours long so we dragged ourselves out of bed super early so we would be among the first in line.


It worked!  No doubt because we were riding with a friend and had no choice but to get our booties in gear.  It was pretty cold when we first got there so I convinced Kate to wear my hat.  So cute.


The downside to arriving 45 minutes early to avoid the lines is that you have 45 minutes to kill before they’ll let you in.  Luckily there was a nice open area for the kids to run around in.


Kate was amazed and, to be honest, so was I.


It was kind of like being onside of a giant bouncy house made of tubes.  Oh, and with crazy light coming in.


We were in the first group in so it wasn’t crowded when we first entered.  Of course 15 minutes later it was getting quite crowded, so I’m really glad that we got there early.

Kate is generally all over having her picture taken, but today she refused to pose.  She kept wanting to lay down in the middle of the rooms and stare at the ceiling.  I can’t blame her!


It was an awesome morning capped with a trip to the hamburger joint that has an attached playscape and ice cream shop.  Let’s just say that Kate was one very happy 2 year old.

Crock Pot Fail!

Flush with success from my crock pot beans, I decided to try out a tofu recipe.  It sounded delicious.  I mean, orange, honey, and soy sauce.  What’s not to love?

I started off my sautéing the tofu in a little bit of butter with some garlic per the recipe.  Side note: let’s all pretend like my stove is sparkling clean.  I actually considered spending an hour trying to photoshop out the mess.  Perhaps next time I’ll just spend 30 seconds cleaning the stove instead.

The recipe called for 1/4 of a cup of orange juice, but we don’t keep juice in the house.  I used my lime squeezer to juice some clementines instead.  Incidentally, I found that it’s much easier to juice them with the peels still on so I switched to that method right after taking this photo.  I threw the crushed (and peeled) oranges into the crock pot for a bit of fiber.  Even after adding the soy and honey, it didn’t seem like enough liquid, but it ended up being fine.  At least with regards to the liquid.

I put in some broccoli like the recipe called for and I added a bit of squash because we like veggies.  Perhaps I should have stuck with the recipe…

It looked (and smelled) great.  The last hour I threw in some quinoa since that worked so well with the beans.  It’s at about this point that it all started to go downhill.  The quinoa didn’t cook (probably because there wasn’t enough liquid), the veggies were totally mushy, and the sauce was pretty flavorless (maybe I should have stuck with the juice?)

Final verdict?  Well, Kate and Michael both felt the need to rinse their mouths after tasting it so we ordered pizza.  I might have to break up with my crock pot.

I think I would totally try this recipe again, just not in a crock pot.  The sauce has a lot of potential and if the veggies were just lightly steamed I think it would have been great.

Water Beads

I know that I can’t be the first person to post about this, but it’s new to me so I’m going with it.  🙂  I helped make a bunch of rose centerpieces (they were gorgeous by the way) for my college sorority’s formal recruitment a few weeks ago and we had a ton of these water beads left.  I knew that Kate would love them so I snagged a ziplock of the extras before they were thrown away.

Kate thought that they were just about the coolest things ever.  I’m not really sure how to describe them…  They’re sort of squishy, but firm at the same time.  Almost like tapioca but cooler.

None of us could stop playing with them.  🙂

Fair warning, after about a week and a half they started to attract fruit flies so they had to go.  Next time, maybe we’ll keep them in the fridge or something.  And trust me, there will be a next time because these are awesome.

December Daily Wrap Up

It’s done!  Finally!  I’m so glad that I did it again this year, but I’m not going to lie, I was happy to pack it away.  🙂

   Seeing as how Christmas Eve is my favorite, I had a lot of pictures I wanted to include.  We let Kate open up her present from us on Christmas Eve morning.  We had lots of fun playing candyland as a family.


These 2 pages are just pictures taped back to back.


This base for this page is a transparency with a bit of washi tape added.  I used some metal numbers to add the date.


Here’s the backside.  I kept is simple with just a photo collage.


I had a lot of pictures from Christmas morning too so I added a page.  I used a sheet of card stock as a base for this page and added a bit of twine and a rubbon.

I added another photo collage and some journaling to the back.


Santa brought Kate a playscape and she was thrilled.  She immediately proclaimed, “I have a park in my backyard!”

Backside just has a picture collage.  In retrospect, I wish I had flipped the base piece of paper so that the dots were in the front and the trees were on the back.


The back cover is a piece of acrylic just like the front cover.  This helps give the book some more stability.


Apple Chips

Today we made apple chips!  I, of course, found the inspiration on Pinterest.  Love that site.  First I peeled the apple.  I know that it would have looked prettier with the peel on, but this wasn’t an organic apple so it *had* to be peeled.  What.  Don’t look at me like that.  I’m not crazy.  Then I thinly sliced it and cut out the bit with the seeds.


My lovely assistant Katherine helping me to put the apples on the cookie sheet.  Please ignore the fact that she’s still in her jammies and she’s covered in chalk.

You’re supposed to line the cookie sheet with parchment paper, but I never seem to have any of that so we used waxed paper instead.  It stuck to the cookie sheet after baking which kind of defeated the purpose.  We might skip it next time.


You can smush all of the apple slices together; it’s fine if they are touching.  We sprinkled them with a bit of cinnamon and into the oven they went.  They’re supposed to cook at 275* for 2 hours and you turn them over at the hour mark.  Of course, I screwed this up.  Luckily apple chips are pretty forgiving.  The first time I did this right and they came out perfectly.  This time I baked them at 225* and they didn’t quite crisp up.  They are still mighty tasty though.  

I’m sure these would be even better with the addition of some butter and sugar.  Mama’s on a diet though and Kate doesn’t know the difference.

The best thing about these is that they make your house smell amazing.  They are a lot of work though and you don’t get much return.  Perhaps I should buy a candle instead?  🙂


Tasty Gingerbread Fun

I’ve decided to ignore the fact that I still have pictures left to scrap from this summer in favor of playing with my new Christmas paper.  What?  Don’t try to deny that you do the same thing.  🙂  These are the pictures from when we went to decorate gingerbread houses at the Children’s Museum.  Love them!

Ignore the precariously balanced pages.  I decided that the pictures would photograph better against a red wall so I balanced them on my headboard.  I didn’t want to move them around too much for fear they would fall behind my bed.  🙂  All of the paper and the chipboard stickers are from the 12 Days of Christmas collection from My Mind’s Eye.  The letters are from October Afternoon and Thickers.

I decided to stitch a border around the pictures with my sewing machine.  I looked over at it and it was already threaded with pink thread.  How could I resist?

I inked the edges of the paper with pink ink and added a chipboard sticker across the bottom.  I cut it along one of the candy pieces to make it shorter.  Plus, I can use the other part on another layout.

I added another chipboard sticker at the top of the page and then added the title.  It still seemed like it needed a little something something so I added some stitching to make a border.

I added the date and a bit of journaling and called it good!